4 Simple Steps to Creating a Percentage (%) Discount in Shopify
Boost conversions by showing customers exactly how much they're saving! Learn how to add discount percentages on your Shopify product pages in just a few easy steps.
Updated July 8, 2024.

Offering discounts to your customers is a powerful marketing tool that allows them to feel valued and like they have greater purchasing power. This can quickly boost your brand's popularity, drive more sales, and, ultimately, increase your profits.
Percentage-based discounts apply a markdown to the total of an order or a specific product according to your specified reduction amount, e.g., 20% off. This discount remains constant regardless of the price or currency used.
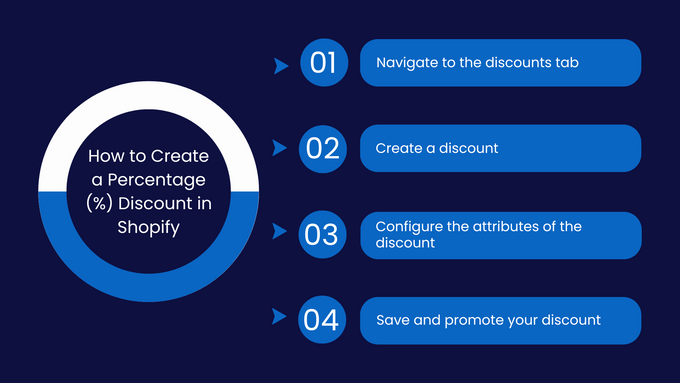
Follow these simple steps to add a percentage discount to Shopify.
» Enhance customer loyalty with personalized, automated discounts
1. Navigate to the Discounts Tab
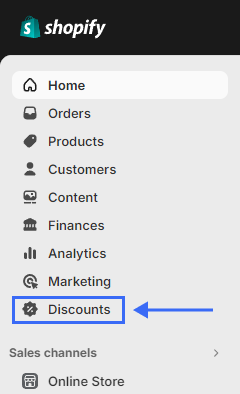
Log in to your Shopify Admin and navigate to the Discounts tab on the left.
» Boost your sales and customer satisfaction with strategic Shopify discount codes
2. Create a Discount
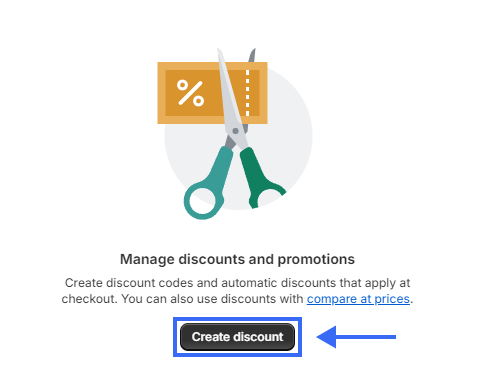
From the Manage discounts and promotions window, click Create discount.
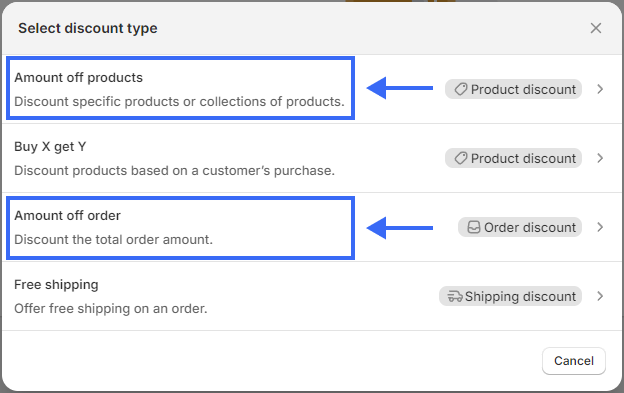
From the pop-up window, select the class of discount you wish to create. For % discounts, choose from Amount off products or Amount off order.
» Simplify your workflow—Learn how to bulk add discounts for your Shopify products
3. Configure the Attributes of the Discount
Next, you'll need to configure the attributes of your discount:
Discount Code
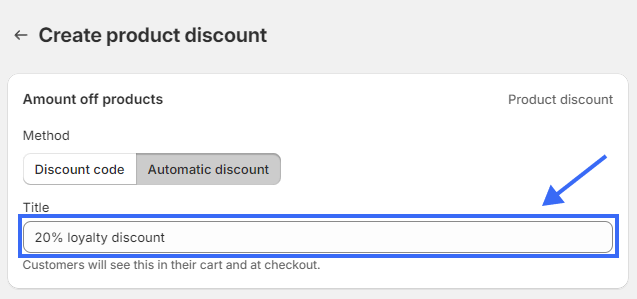
Decide if you want the discount to be automatic or if your customer will need a discount code.
- For Automatic discounts, input a title you wish your customers to see.
- If you opt for a Discount code, you can manually input a discount code of your choice or choose to have it automatically generated.
Options
Under the Value section, you can choose from a percentage discount or a fixed amount.
- Select Percentage and enter the percentage discount you wish to offer.
Applies To
In the same Value box from the previous step, select the item(s) the discount should apply to. You'll have the options of:
- Specific collections
- Specific products
Once you've selected specific products or collections, click Browse to search for the collection or products you wish to apply the discount to.
Minimum Requirement
Next, you'll need to set the minimum purchase requirements to activate the discount.
Your options include:
- No minimum requirements
- Minimum purchase amount
- Minimum quantity of items
If you wish for no minimum requirements, select the relevant box and move on.
If you want to set a minimum purchase amount, select Minimum purchase amount and enter the amount (in your store's currency) that customers need to spend to obtain the discount.
To set limits by item quantity, select Minimum quantity of items and enter the required value.
Customer Eligibility
Under the Customer eligibility box, you can select which customers or types of customers will qualify for the discount.
You can choose from:
- All customers
- Specific customer segments
- Specific customers
For specific customers, select Browse and choose the customers you want to make eligible for the discount.
For specific customer segments, select Browse and choose one of the following segments:
- Customers who haven't purchased
- Customers who have purchased more than once
- Abandoned checkouts in the last 30 days
- Email subscribers
Usage Limits
Next, decide how you want to limit your discount. Select either:
- Limit to one use per customer, or
- Limit number of times this discount can be used in total.
If you want to set a usage limit, click on the relevant box and input the value.
Active Dates
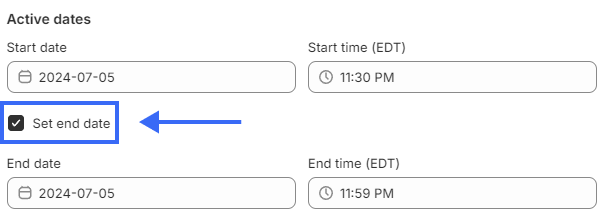
As a final step, define the timeframe for your discount. Pick a start date and time, and if desired, set an end date as well.
» Maximize your promotional impact by creating multiple discount codes at once
4. Save & Promote Your Discount
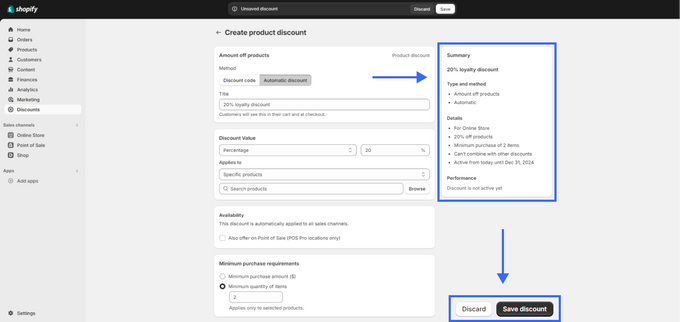
After you've configured your discount, you can review its details in the box on the right-hand side of your screen.
If you're happy with your configuration, select Save discount, and your percentage discount will be added to your Shopify store.
Once your discount is saved, you can promote it through social media and other marketing channels.
» Find out how customer loyalty rewards can lead to better retention
Enhance Your Shopify Discount Strategies With Automation
The process of adding discounts by percentage in Shopify is straightforward, but specific situations and conditions require more in-depth thought. Using an app such as Order to Discount by Egnition will automate your customer care process and allow you to create specific email and discount templates.
This will ensure that your customers get the best available support, feel valued regardless of their situation, and, ultimately, bring them back over and over, thus boosting your sales and ROI.
» Check out this Order to Discount review for more details
