How Do You Change the Default "Sort by" Option in Shopify?
Easily change the default "Sort by" option in Shopify by following these steps.
Published June 28, 2024.

Mastering Shopify's "Sort by" feature is essential for customizing and optimizing your online store. This feature allows you to strategically organize products, showcasing your bestsellers or preferred items first. Here's how to manipulate the Shopify "Sort by" options to enhance your store's functionality and user engagement.
» Take control of your Shopify store through automation
Understanding Shopify Sort Options
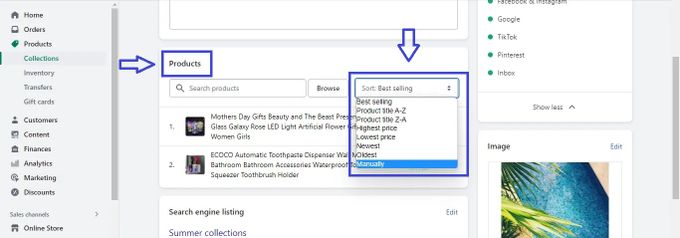
Shopify provides several "Sort by" options for your products. The default setting is usually set to ‘Best selling.’ However, depending on your store and what you sell, you might want to change the default to something else to better suit your store’s needs, such as one of these "Sort by" options:
- Manual order selection
- Best-selling products (default)
- Price: highest to lowest
- Price: lowest to highest
- Alphabetical order
- Reverse alphabetical order
- Newest to oldest
- Oldest to newest
» See how Shopify compares with Amazon in product sorting capabilities
Understanding how to change the default "Sort by" option when managing your Shopify store is essential for showcasing your merchandise effectively. For example, if you're a fashion retailer, you may find that sorting your products by the newest arrivals offers a more appealing presentation.
Step-by-Step Guide to Change Your Default Sorting Options
On most Shopify themes, the default alphabetical sorting order is applied to any collection you add. However, this sorting option may not suit your shop if it requires a more user-friendly display of featured or best-selling products first. Here's what you need to do to change your sorting settings.
Change the Sort Order for the Products in a Collection
- From your Shopify admin panel, go to Products > Collections.
- Select a collection.
- Under the Products section, click the drop-down list beside Sort and select your preferred sort-by order.
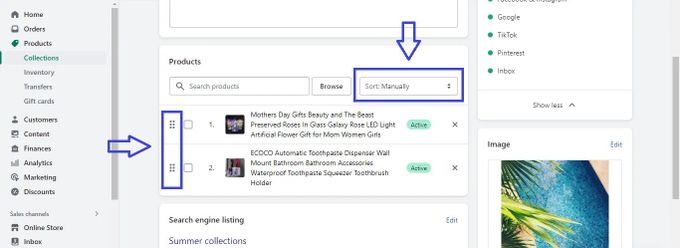
- When selecting Manually, you simply click and drag the products in the list to reorder them.
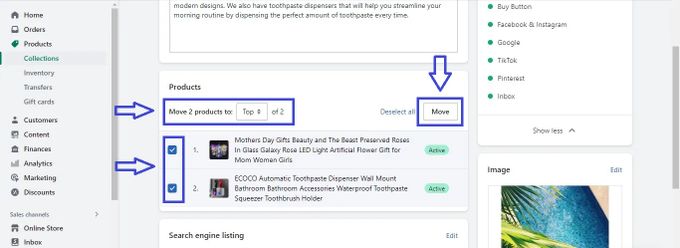
- Another option is to click and select one or more products in the list. Select Move to reorder them into the desired position within the collection.
» Expanding your collection? Learn how to group and add new products to your Shopify collections
Change the Default Sorting Option on the Products Page
Beyond the "Sort by" options, Shopify also allows you to automatically organize your product listings more effectively. Follow the steps to leverage this capability to feature specific items prominently and enhance revenue:
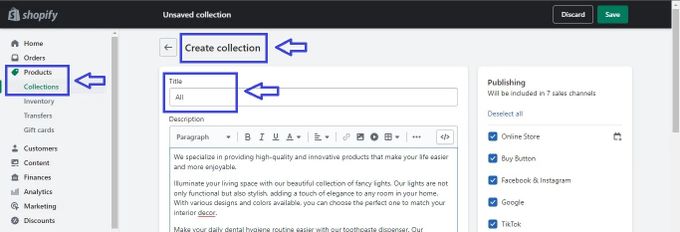
- Create a new collection and change the title to All.
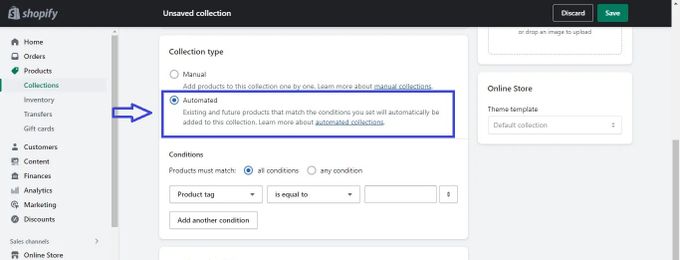
- Under collection type, select Automated.
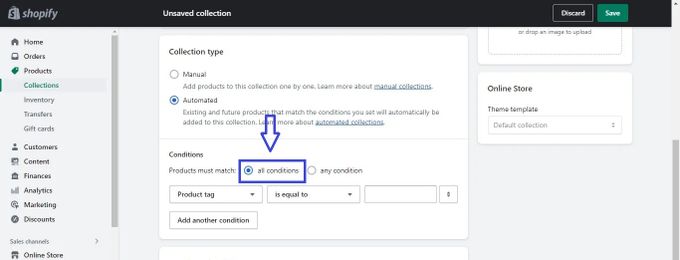
- For Products must match, select All conditions.
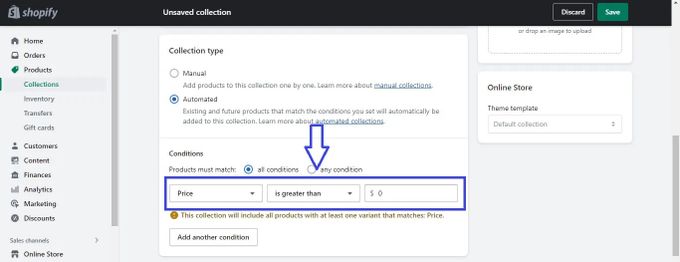
- Set Product Price to is greater than 0.
- Click Save.
This process will automatically apply to all the products in your Shopify store.
» Here's how to add a product to a Shopify page
How to Remove the "Sort by" Drop-Down Menu
Sometimes, less is more. To remove "Sort by" options in Shopify to simplify your customers’ shopping experience and guide them towards making a purchase, follow these steps:
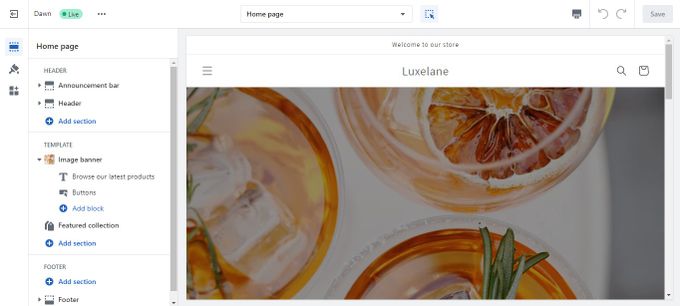
- Go to the Theme editor.
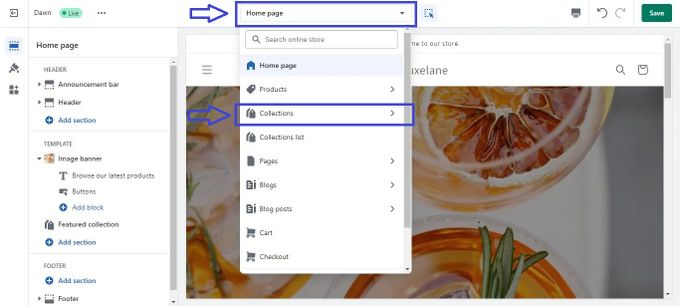
- In the theme preview, click Collections on the drop-down menu from the search bar.
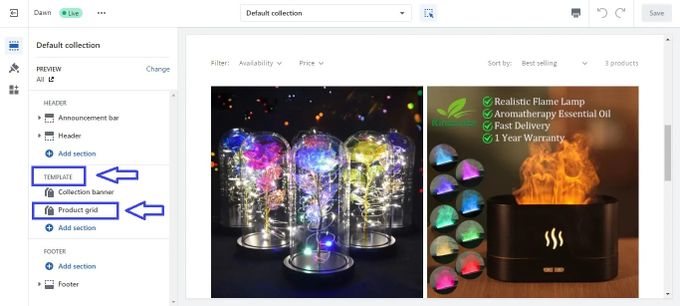
- In the theme editor, click on Product Grid in the Template section.
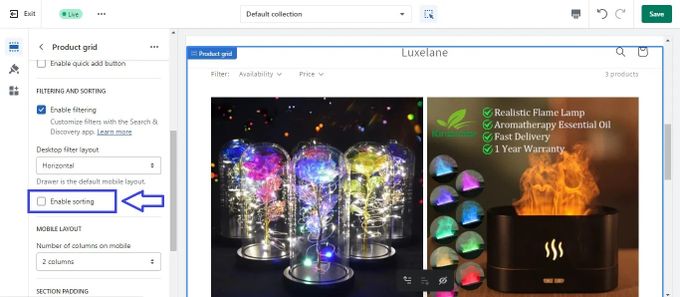
- Scroll down and uncheck Enable Sorting.
- Click Save.
Bringing Your Product Sorting to Order
Shopify offers a range of "Sort by" options, allowing you to tailor your product display to your specific needs. By experimenting with different Shopify sort options, you can enhance your store's visual appeal and potentially increase sales. Rely on Egnition's Bestsellers reSort app for additional customization capabilities, making it easier than ever to change "Sort by" options on Shopify.
» Discover how Bestsellers reSort can help you create precise sorting rules that best fit your business


