Adding Shopify Collections Within Collections (+ Sorting Them Effectively Afterward)
Published July 2, 2024.

Until recently, Shopify users faced limitations in organizing their online stores with sub-collections and smart sorting options. With a recent Shopify update, Shopify has introduced exciting new features that allow you to enjoy the benefits of adding sub-collections within collections and implement smart sorting for an enhanced customer shopping experience.
In this comprehensive guide, we'll walk you through the process step-by-step and introduce you to a powerful automated sorting tool.
Adding Sub-Collections on Shopify
Once you've added collections on Shopify, simply follow these steps to add sub-collections:
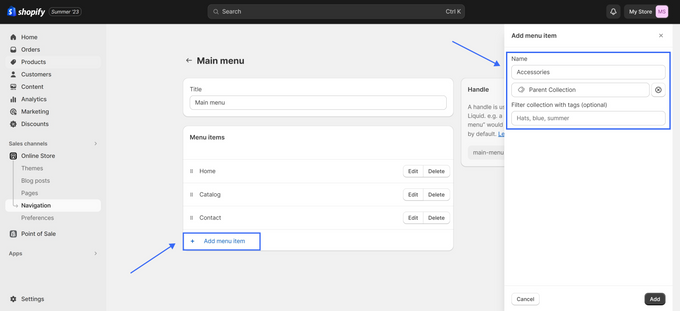
- From your Shopify Admin page, expand the Online Store section under Sales Channels in the dashboard menu.
- Click on Navigation, and from there, select Main Menu. Here, you'll find various navigation options for your store.
- If you don't have menu items set up, click Add menu item. Give the item a name and select one of the collections you've previously set up.
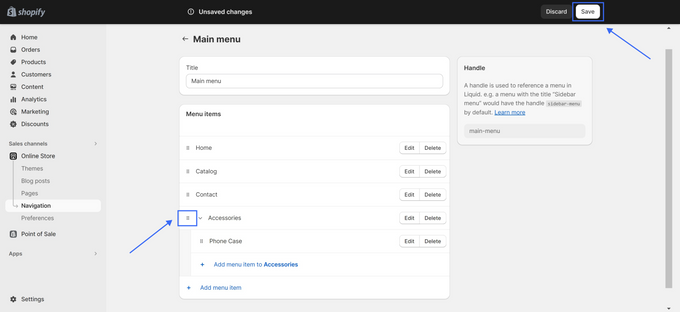
- To create a sub-collection, add another menu item. Use the six dots to click and drag the sub-item underneath another collection slightly to the right. When done correctly, a purple bar with a small dot will appear, indicating it's now a sub-collection. Release the mouse button and click Save.


Pro tip:
Verify your changes by checking the front end of your store to ensure that the sub-collection now appears nested within the main collection in your site's navigation bar.
» Don't mix up Shopify categories with collections
Sorting Collections on Shopify
Sorting your collections is crucial for a seamless shopping experience. Here are two methods to achieve this:
1. Manually Sorting Your Shopify Collections
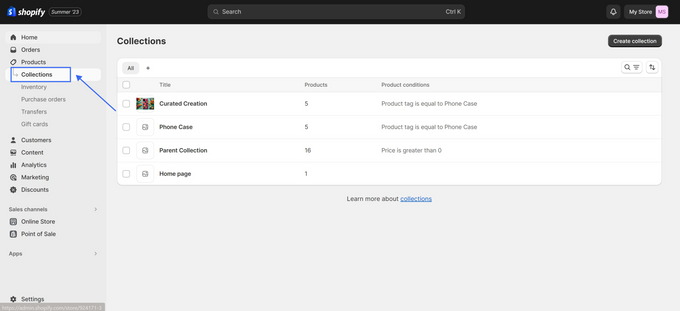
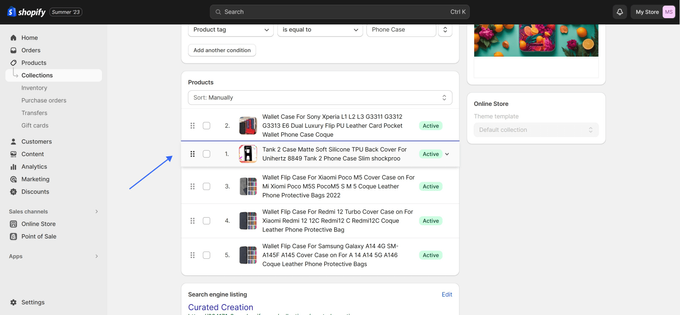
- Head to the admin and click on Products and then Collections.
- Select a collection.
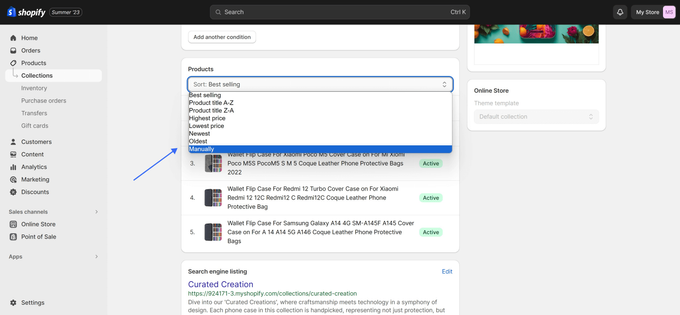
- In the Products section, click the Sort drop-down menu and select Manually.
- Drag and drop the collections to arrange them as you prefer, then click Save.
2. Automatically Sorting Your Shopify Collections
Unlock the ultimate efficiency by switching from manual collection sorting to automatic with Bestsellers reSort.


This tool empowers you to:
- Prioritize high-demand items.
- Manage inventory effectively.
- Maximize cross-selling potential.
With advanced sorting rules at your fingertips, Bestsellers reSort ensures your Shopify collections resonate with your audience's preferences.
As we conclude our exploration of manual and automatic sorting methods, it's clear that this duo elevates the customer's shopping experience. Combine manual curation with automation to create captivating collections, drive conversions, and position your brand for success.
» Discover more about this helpful tool in the following Bestsellers reSort review